
Create Grouping Reports
The Benchmark Reporting suite allows you to group students by their standards performance. Choose a grouping strategy to create small groups based on standards performance to help you personalize your instruction.
If you're looking for a particular section about Creating Grouping Reports, use the links below to quickly move to that section:
Use the Edit Groups Page to Create Groups
Save Groups from Grouping Report
Access the Grouping Tab
You can access the Grouping tab by following a few simple steps.
-
Access Reports.
-
Select Class in the Report Level Selector.
-
Select Standards in Report Type Selector
-
Select a class in the Class dropdown in the Roster tab in the Universal Selector.
-
Click the Grouping tab to the right of the Overview tab.
-
The Edit Groups page appears.
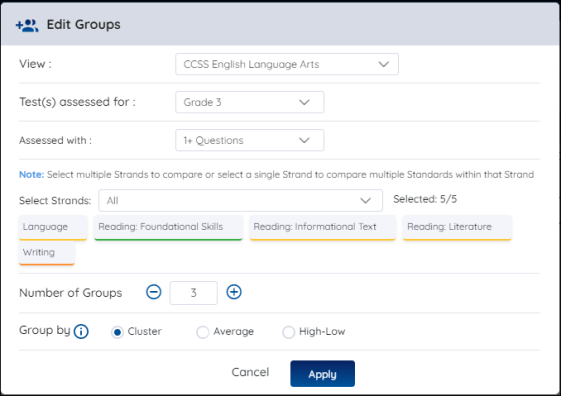
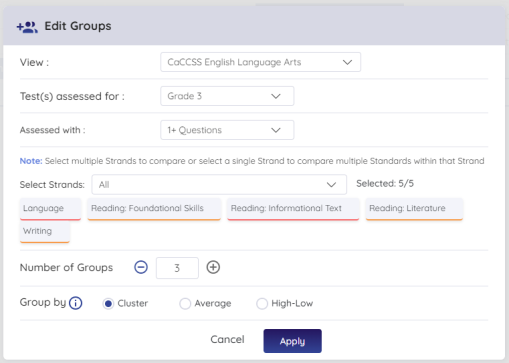
Use the Edit Groups Page to Create Groups
The Edit Groups page is where you will use the standards performance of your students to create groups.
Use these steps to start creating groups for your classroom.

- Select your district’s standards.
Use the View dropdown box to select the standards for your district. Most districts will have their standards preselected.

- Select Grade.
Use this dropdown to include results for assessments administered outside of your class grade level. For example, if you administered a second-grade test to your third-grade students, then the dropdown will appear to select either grade 2 or 3 results. This dropdown can only be changed if you have assessment data from other grade levels.

- Select the number of questions
Use the dropdown box to select a number that will then show only standards assessed with that number of test questions.
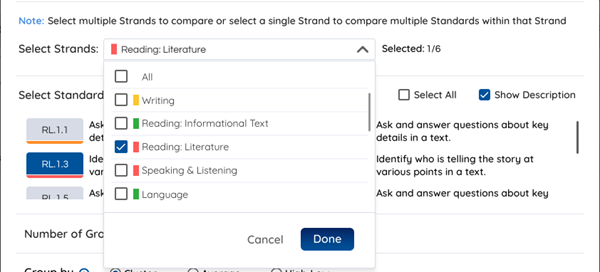
- Select a standard or standards strand.
Use the dropdown box to choose a single standards strand or multiple strands.
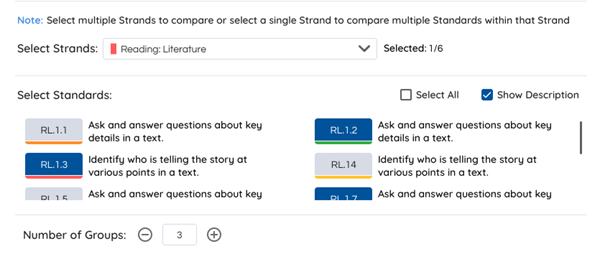
- Select standards
Click on a standard to include it in the standards analysis for your groups. Check Select All include all the standards in a strand in your analysis. This option does not appear when selecting multiple strands.

- Select the number of groups.
Use the plus and minus buttons box to select the number of groups you want to divide your classroom into.

- Select the grouping method.
Select a method for how you would like to divide your groups.
- Cluster: Students are grouped by common strengths and weaknesses on the selected standards. Groups are not necessarily equal size.
- Average: Groups of equal size are created based on students' average score across the selected standards.
- High-Low: Students with the highest and lowest overall average scores across the selected standards are grouped together.

- Create your groups!
Click Apply to create your groups.
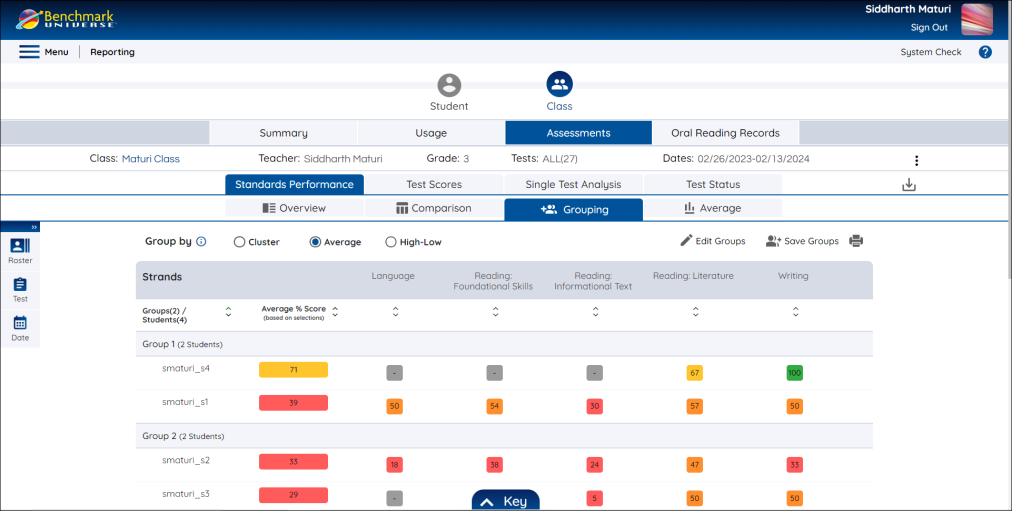
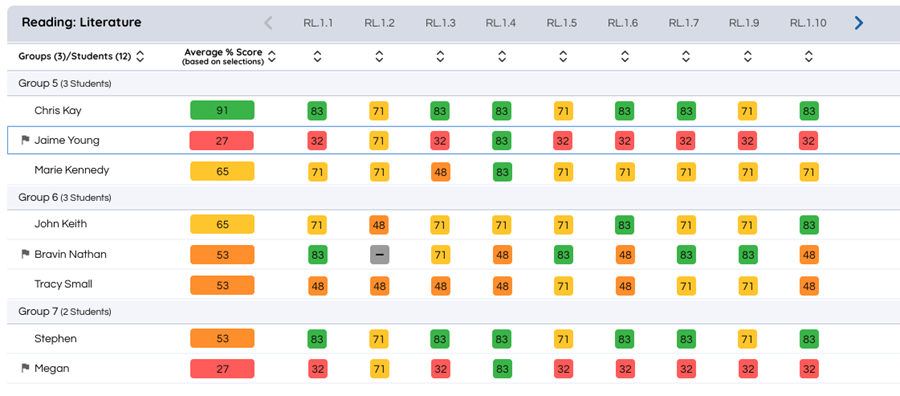
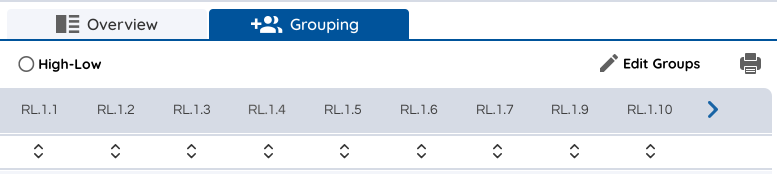
Navigate the Grouping Report
The Grouping Report is where you can edit your groups and view them through different configurations.
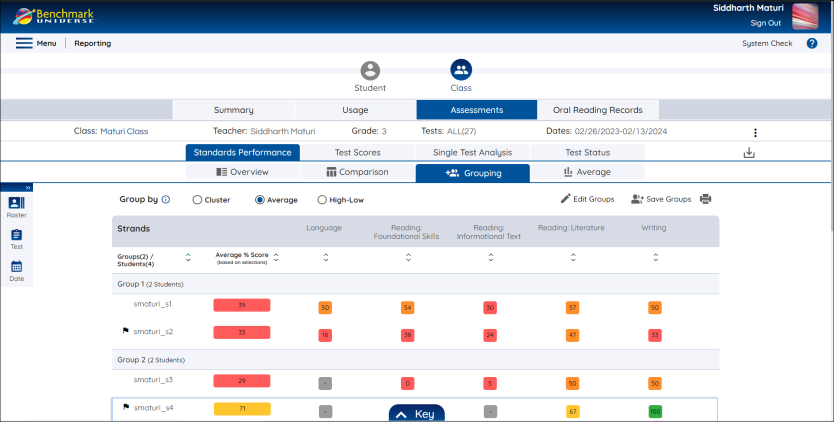
- Group by: change the grouping strategies of your current group.
- Standards navigation: use the navigation arrows to the side of the standards to navigate between the standards you’ve selected for your analysis. You can also use the buttons and arrows at the bottom of the screen to shift between standards.
- Sorting arrows: Use the sorting arrows to change the display order within groups.
- Use the arrows to the left of the Groups/ Students column heading to sort students within groups in alphabetical or reverse alphabetical order.
- Use the arrows to the left of the Average% Score column heading to sort students within groups in ascending or descending order based on their average percentage score.
- Use the arrows below the standards to sort students within groups in ascending or descending order based on their performance in the selected standard.
- Edit Groups button: click the button to return to the Edit Groups page.

|
You can hover on a standard in the standards navigation area to get more information about it. Clicking on a standards score will tell you how many questions tested that particular standard with regard to that individual student’s performance. |
Move Students Between Groups
The Edit Groups page is where you will use the standards performance of your students to create groups. Use these steps to start creating groups for your classroom.
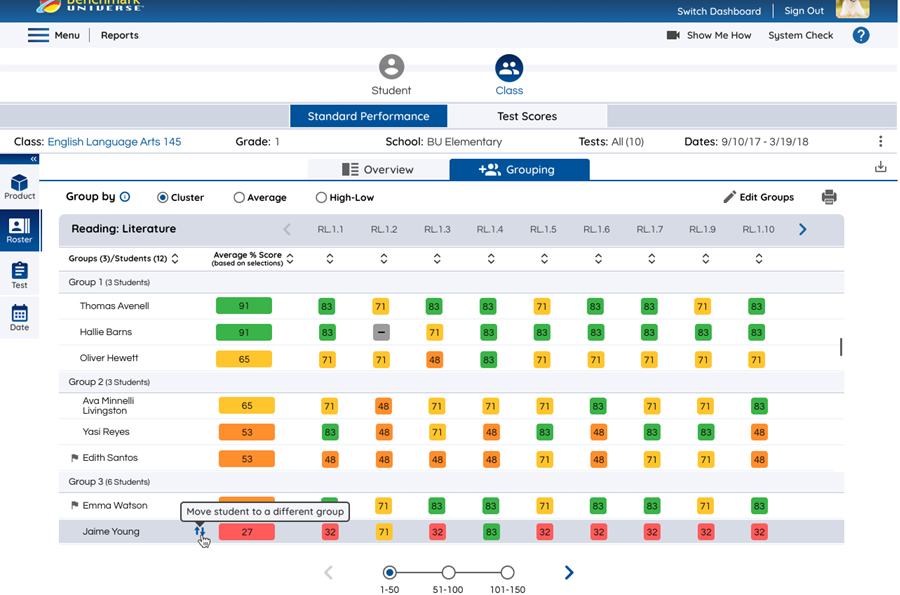
- Hover over a student in the Grouping Report to highlight them. The Move icon appears next to the student’s name.
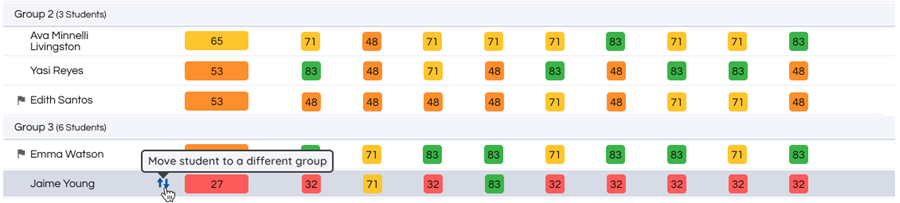
- Click on the Move icon.
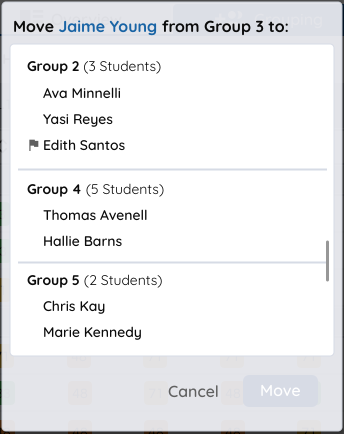
- The Move Student box appears.
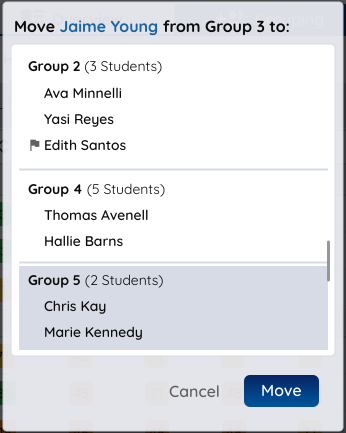
- Choose the group into which you want to move the selected student.
- The student appears in the selected group with a flag icon next to their name.
|
|
All students manually moved between groups have a permanent “moved” icon next to their name. Hovering over the flag icon displays a student's group of origin. Changing the grouping strategy resets students moved between groups. |
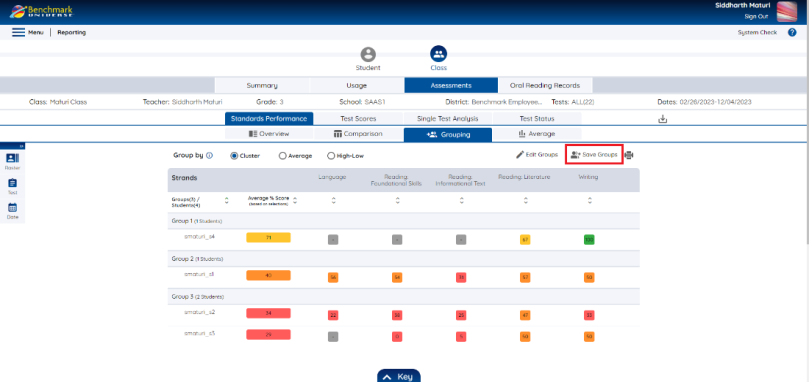
Save Groups from Grouping Report
The Benchmark Universe Reports suite allows Teachers to save the groups that are generated in the Standard Performance Grouping report.
- Open Standard Performance Grouping report in Assessment Reports.
- An edit Standards modal will open. The user can select the parameters such as View, Test(s) Assessed for, Questions assessed with, Strands, Standards, Number of groups, Group by logic.
- The teacher can click on the Save Groups option that is available next to Edit Groups to save the groups that are shown in the report.
- The Save Groups modal will appear where teachers can rename the groups based on their preference.
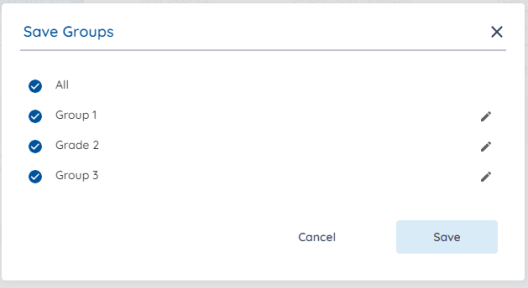
- Teacher can either select ‘All’ the groups or custom select few groups to be saved.
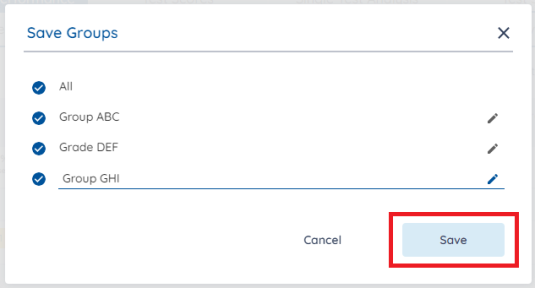
- Teachers can use the Pencil icon to rename the groups.
- Click Save.
- A message is shown at the bottom of the screen that says, “Groups saved successfully in Manage Student”.
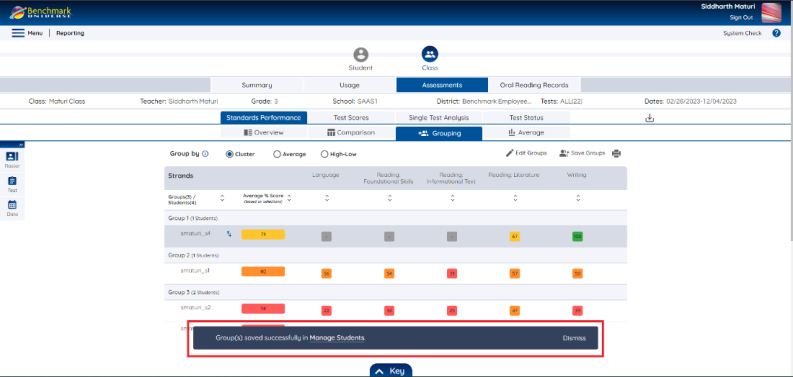
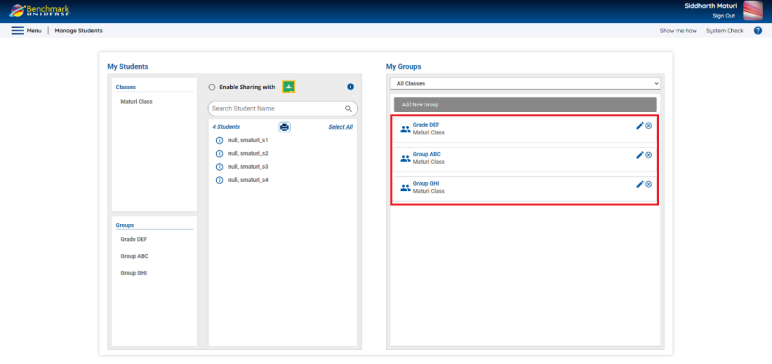
- Click on the Manage Student shown in the message to open the Manage Students section. The user will see the newly saved groups in the Manage Student page. Teachers can create, edit and save groups from the Manage Student section. For more details, look here.
|
|
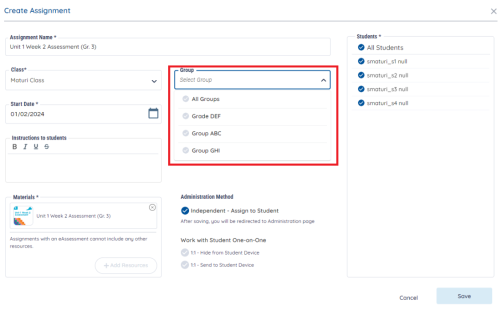
Teachers and Administrator can access these saved groups throughout Benchmark Universe when creating assignments, book reviews, Oral Reading Records, Foundational Skills Assessments, and reports.
|
Print or Download Group
You can create a print record of your groups by following a few simple steps.
-
Create groups through the Edit Groups page.
-
Edit your groups by using the Edit Group tab on the Groups page.
-
Press the Print icon at the upper-right of the Groups page and follow your printer’s instructions.
Teachers can also use the csv. button to download a spreadsheet of their created group (in csv. format).
